Santa Carla Video City - Planet Evil
When I originally planned to do this one sheet design, the idea was to quickly kit-bash some household items together to create a crude spaceship design that I would then photograph. However I'm slowly realising with my Video City project that nothing is quite that simple. Instead I've worked on this particular aspect of the project for close to a year, between building a fairly detailed 1:72 scale ship, learning how to airbrush and model paint as well as creating the planet, and doing the photoshop work. It ended up being quite involved. However I'm really pleased with how it turned out, especially as I haven't done any model making since I was a young teen - and I was never especially good at it then!
As with some of my other one sheets, I wanted to use traditional media and techniques in order to invoke an 80's visual effects tech feel to the piece. Inspired by the legends of the ILM model department, I decided to sacrifice a few of my own model kits that I'd collected (but never built) over the years, plus a few I bought specifically for this project. The goal was to try and create an era appropriate production model that would work well on camera. This would involve kit-bashing, scratch building, airbrushing and detail painting as well as adding decals and washes - all of which are well outside my comfort zone.
I really enjoyed creating the model, although it was a lot of trial and error to get something I felt would photograph well. I also found the airbrush to be exteremly satisfying to use and am excited to use it on the next element of my Video Store project. More to come!
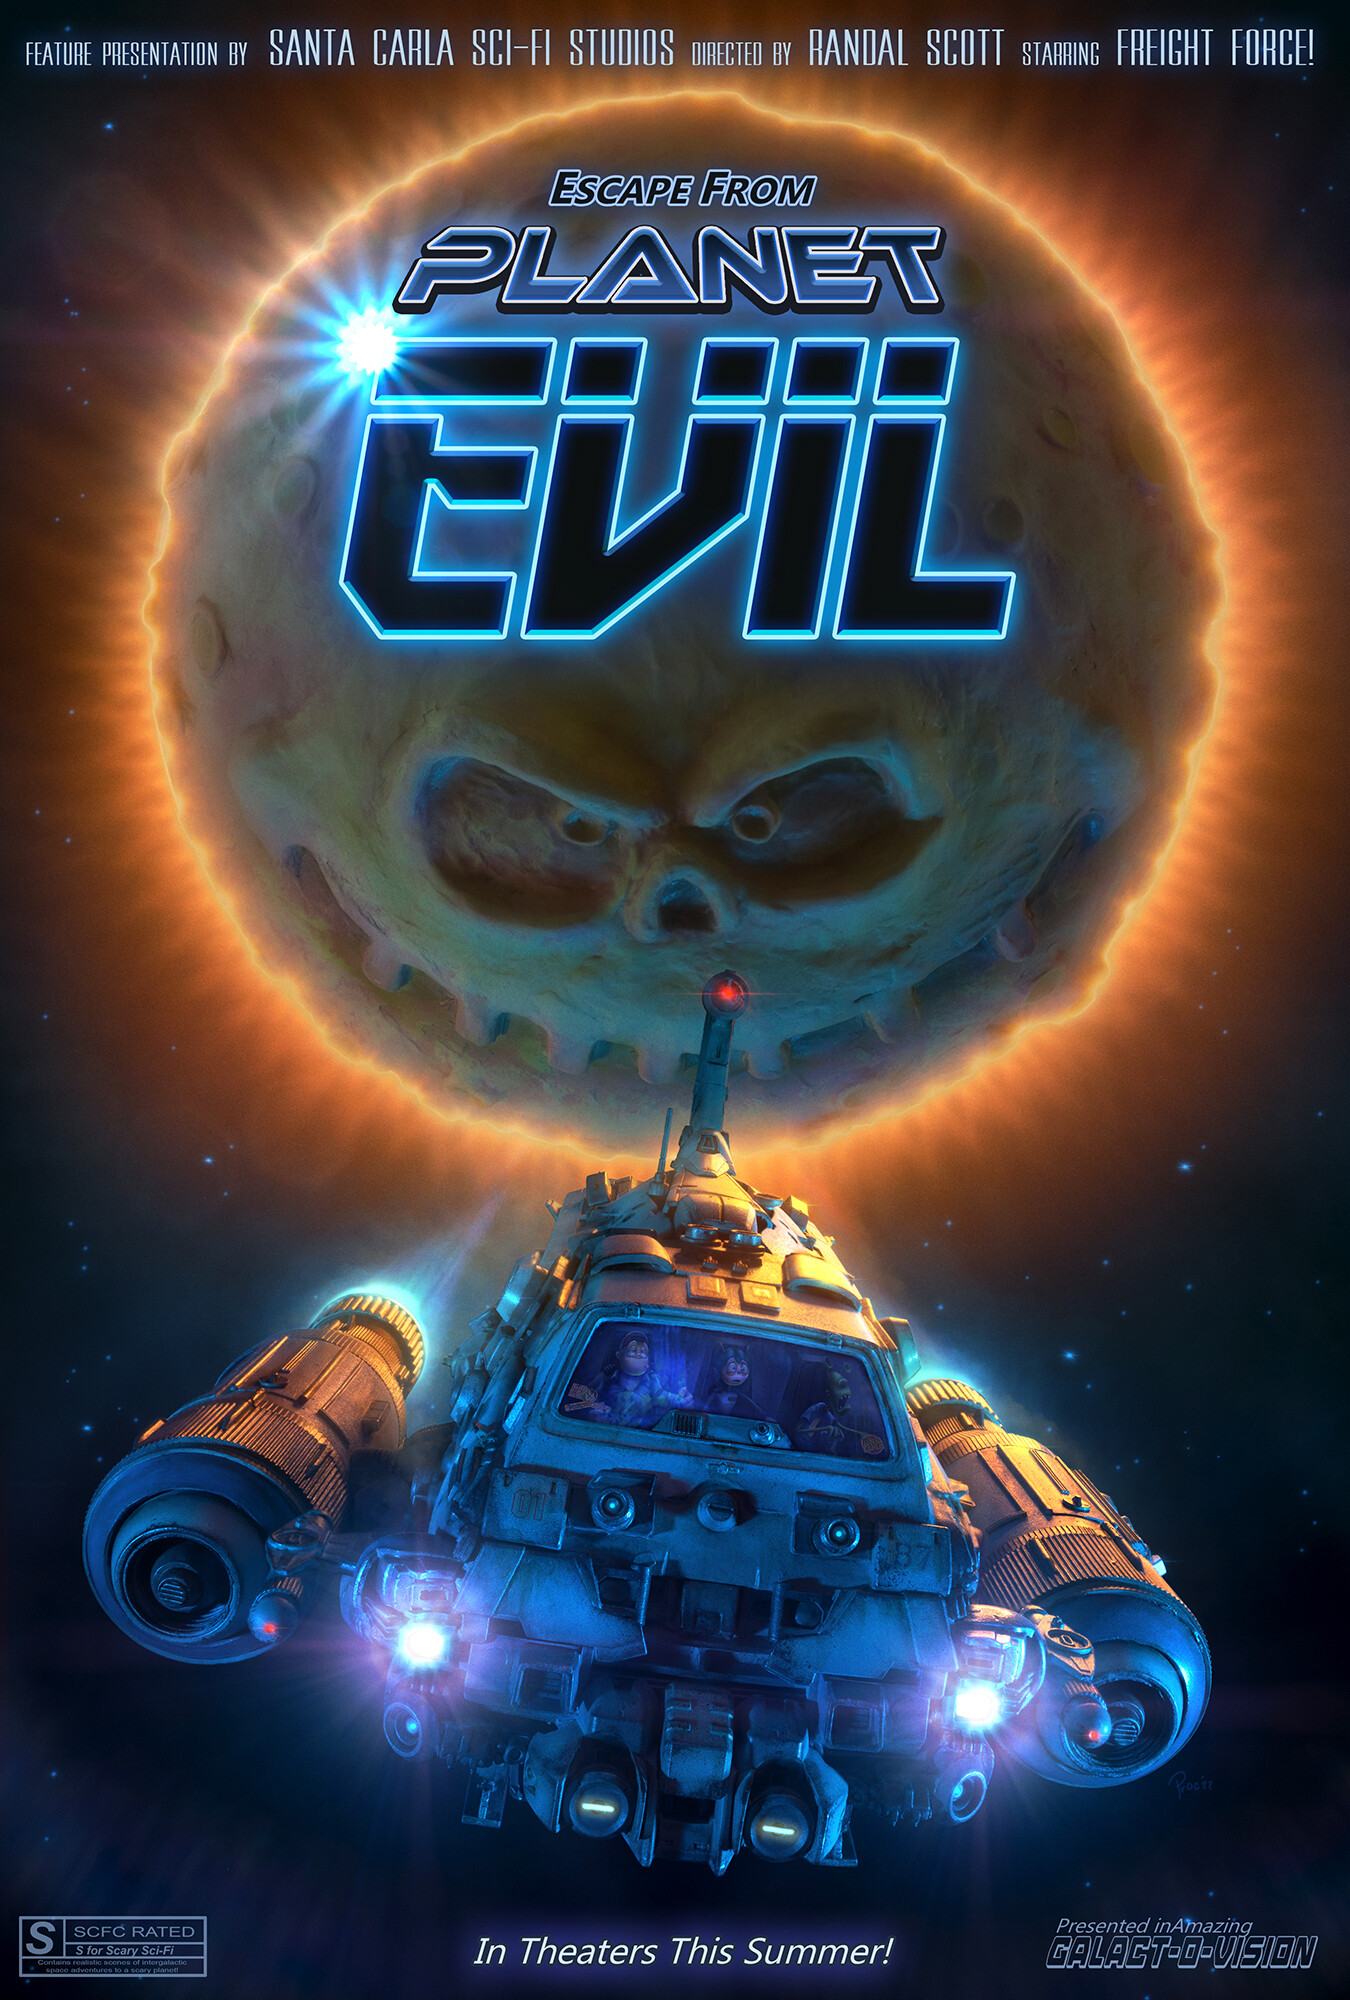
The fiery glow behind the planet was discovered by accident. I noticed the large ring light I was using as a backlight gave off this effect as a flare when the lens was stopped down. Perfect for creating atmosphere and menace!

I shot a few different angles of the ship with small led panel lights to give me options for the rear cover. I also shot a flashlight pointing at the camera to create lens flare elements which I used for the headlights and special effects
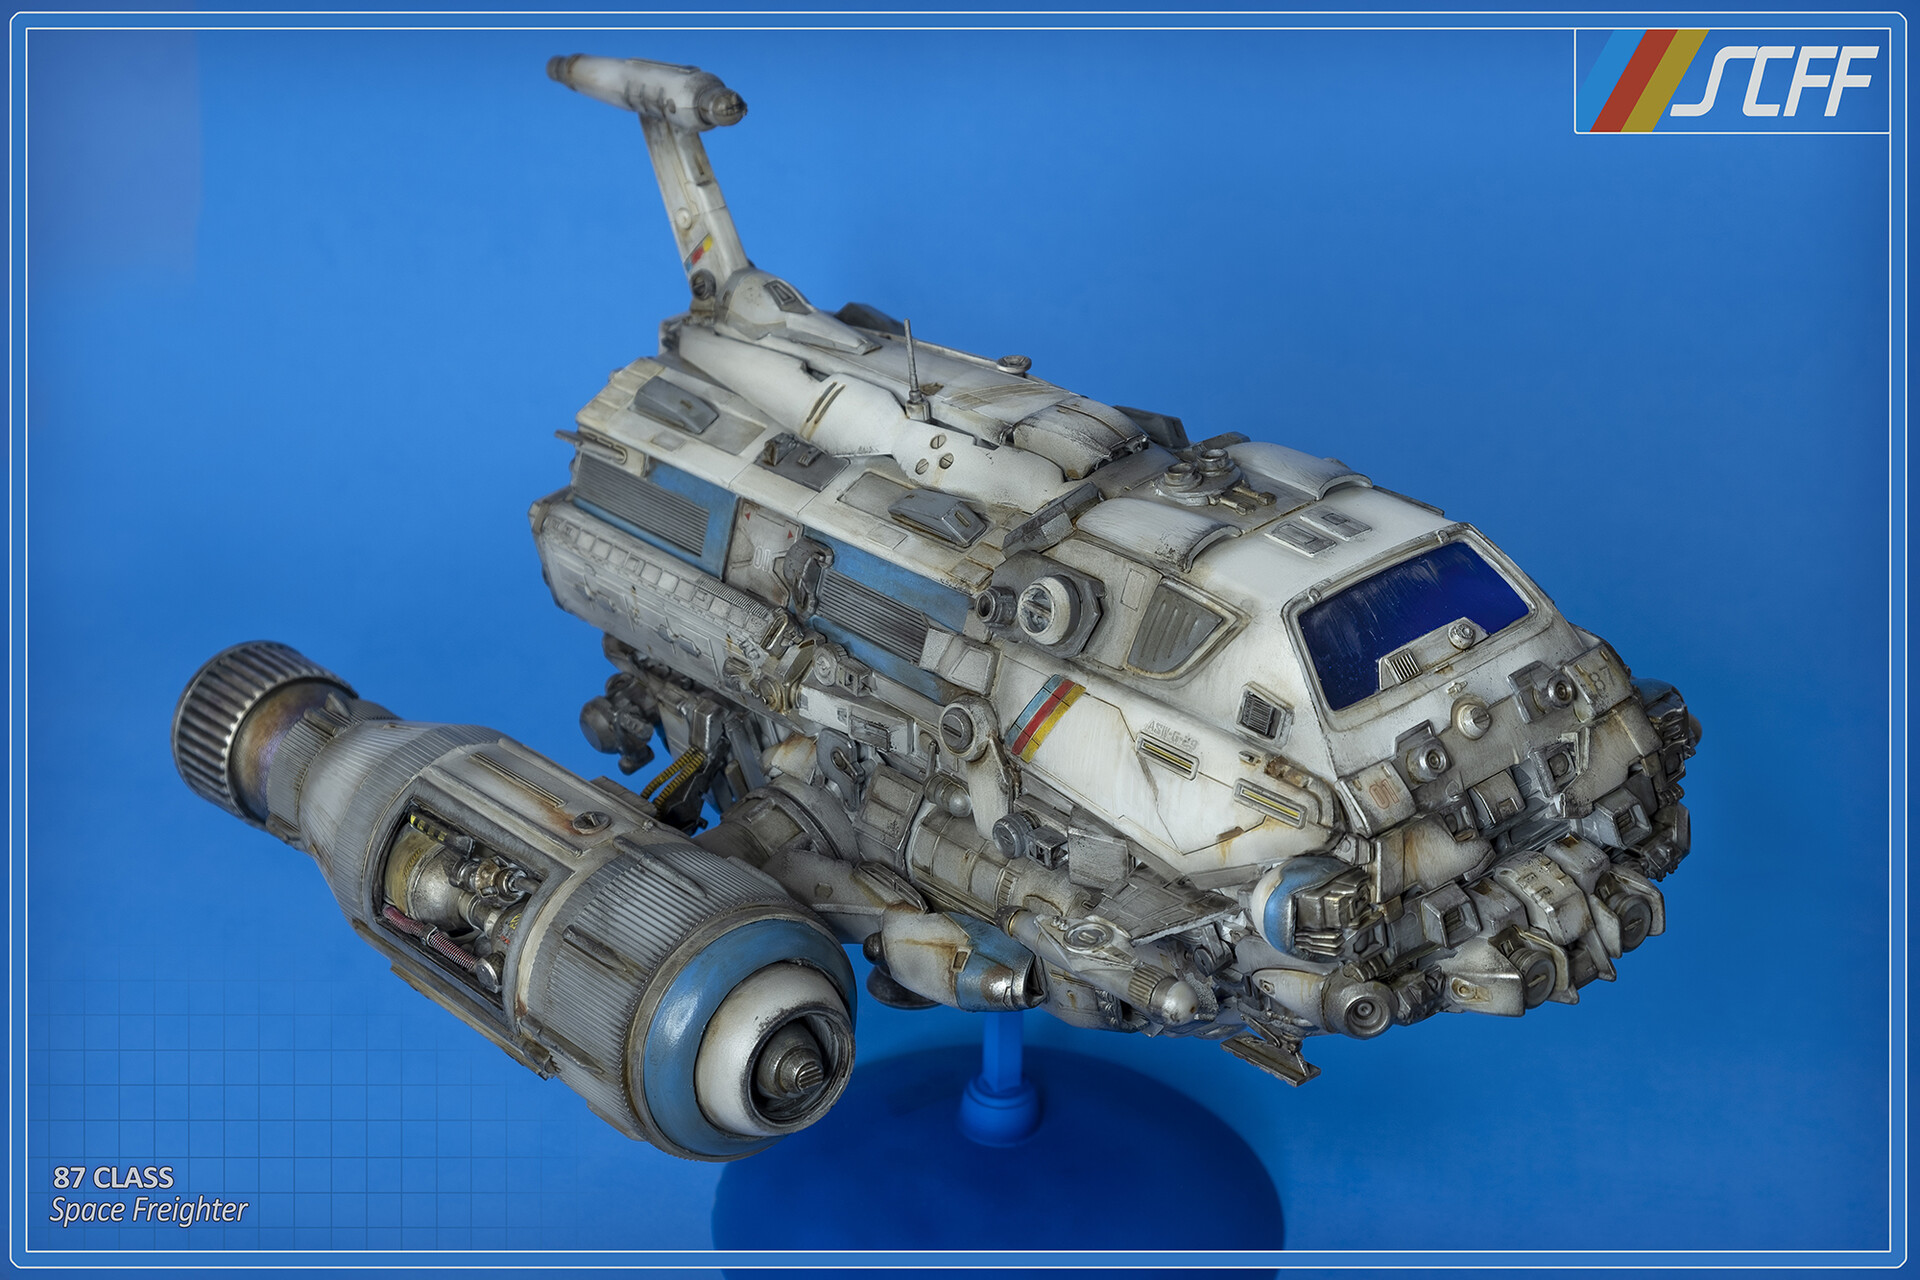
The starboard thruster has a missing cover panel to aid with engine cooling. Details like this were a lot of fun to create
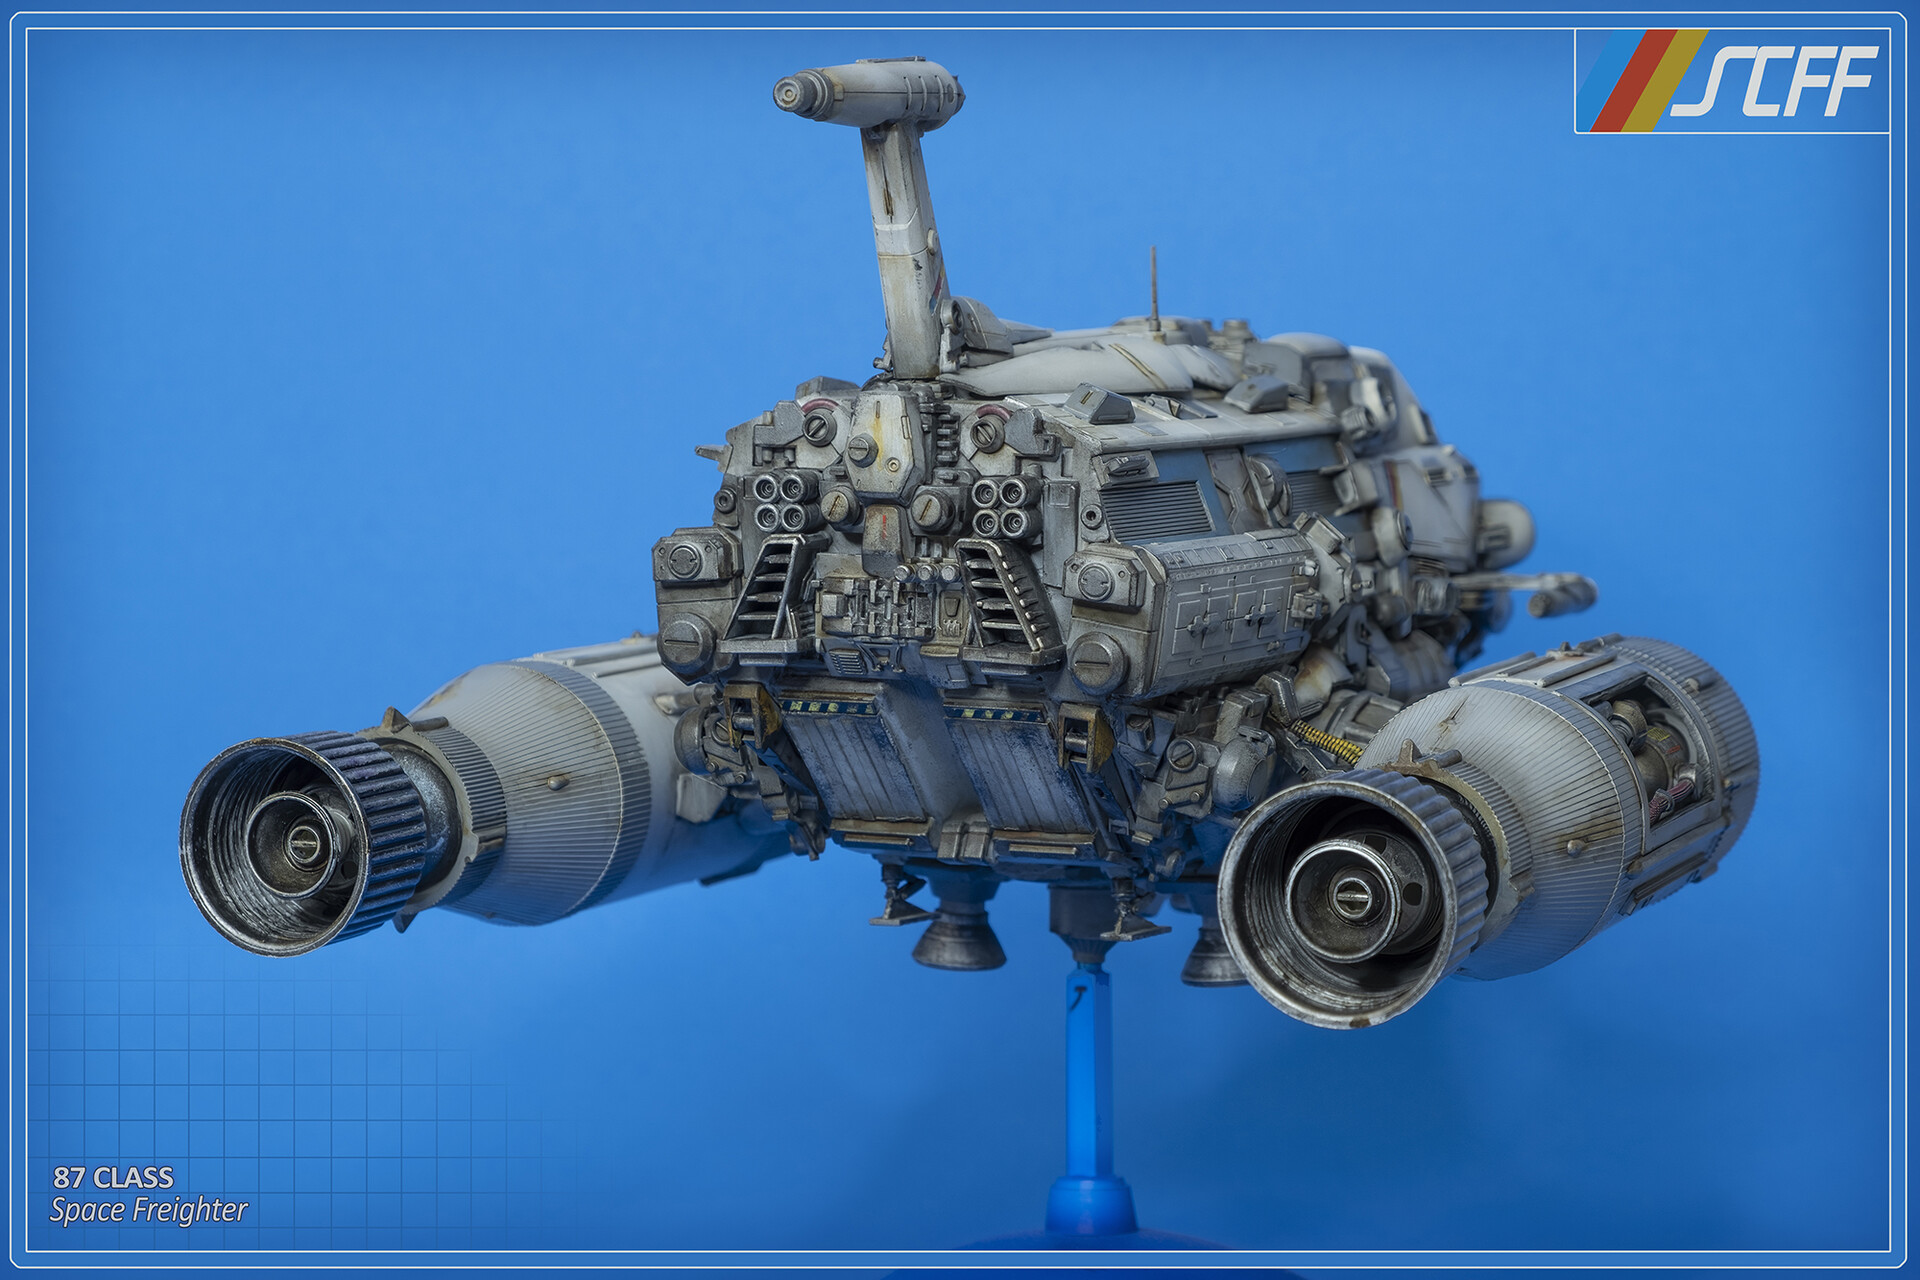
The rear of the ship, showing the freighter doors and refrigeration units. The ends of the engine thrusters are made from icing nozzles!
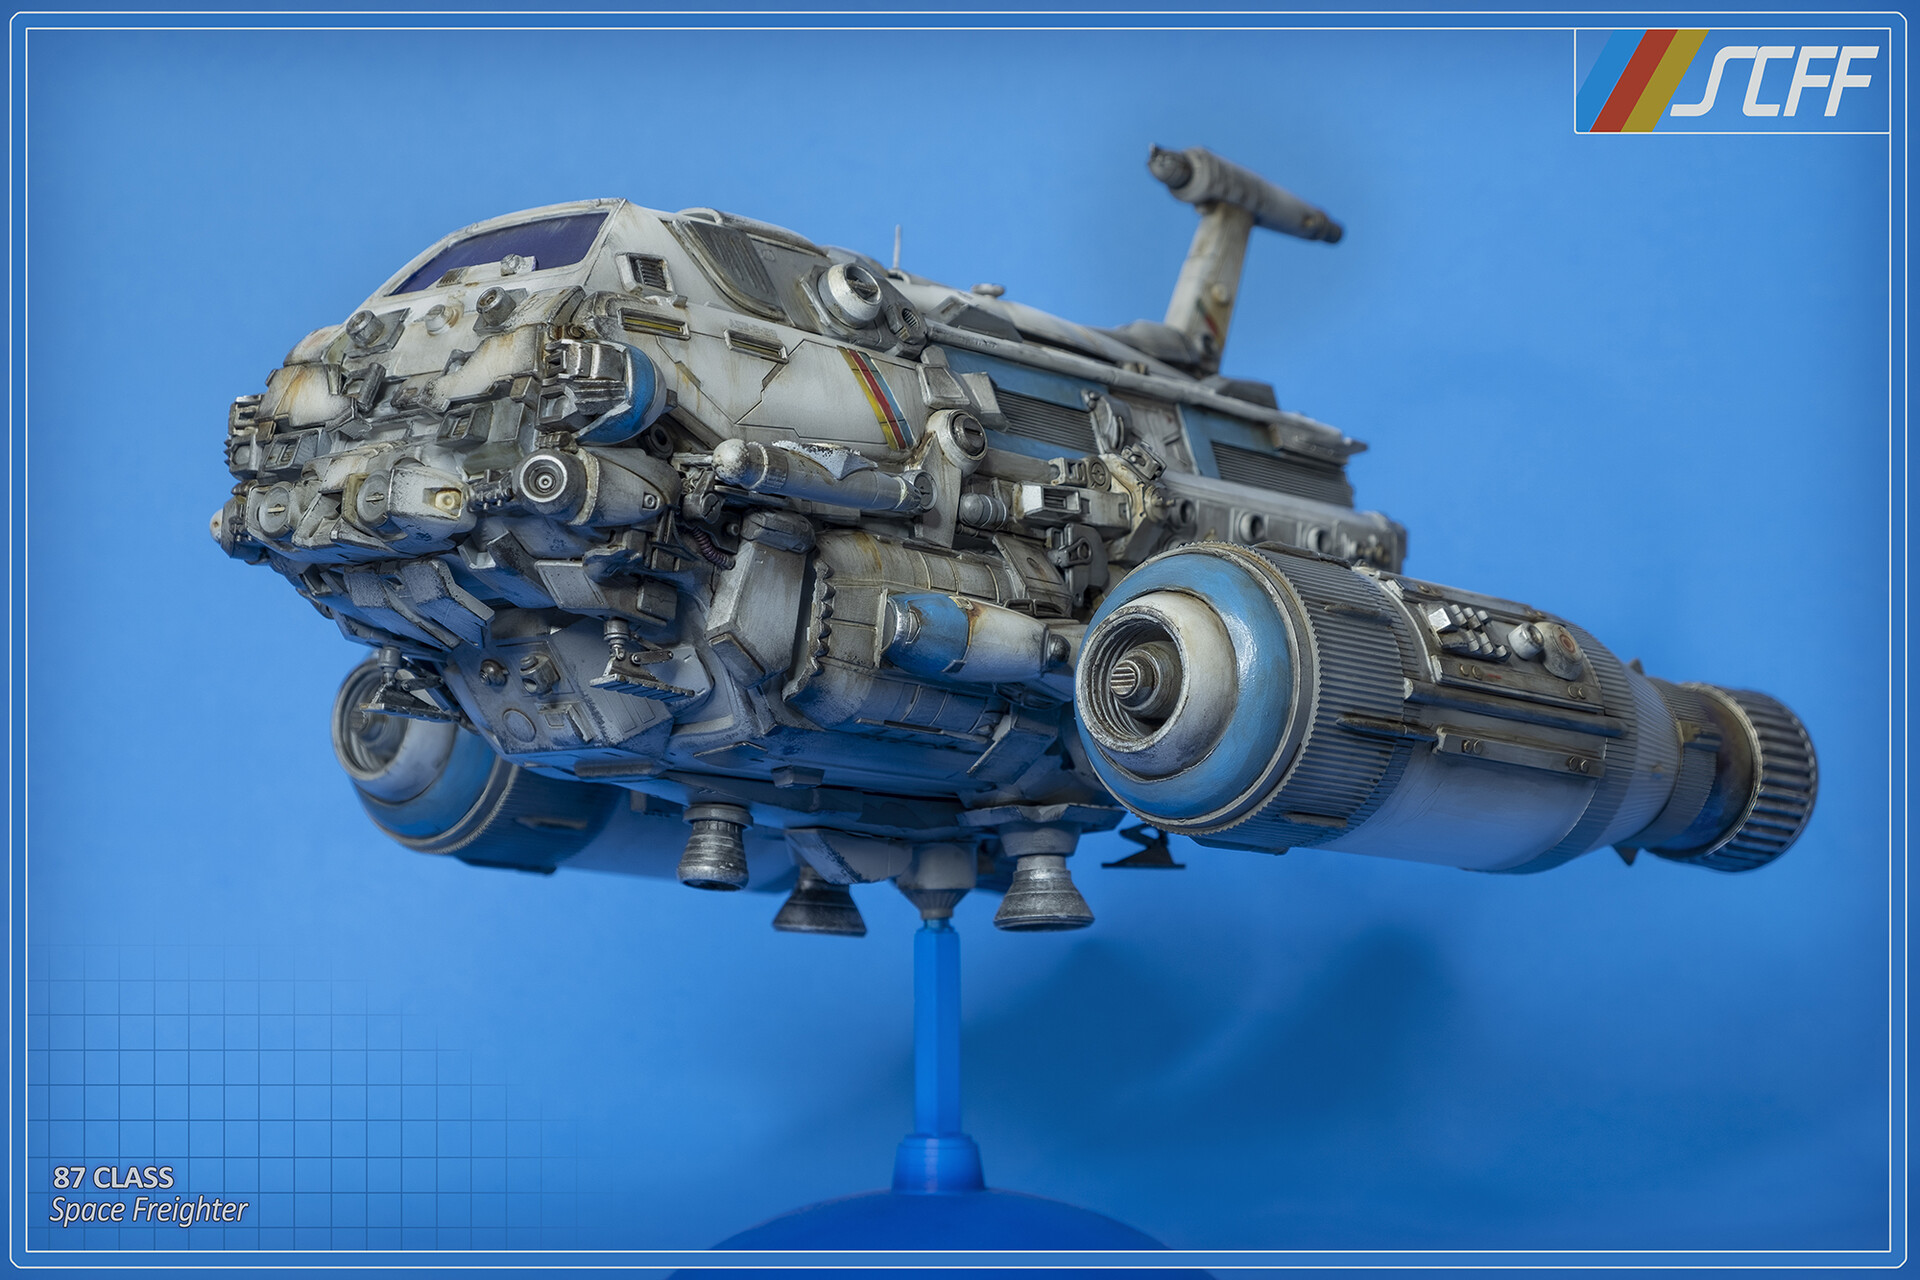
The model was painted with a mixture of Createx paints for the airbrush, Tamiya paints (applied with brushes) as well as Vallejo rust and grime washes

A selection of the model kits used for the ship. I used my airbrush to pre-shade and post-shade the model. The planet used a florist's styrene ball covered in air-dry clay. This was then primed green and airbrushed to add contrasting colours